
 Freelancer administrative conundrums
I have not always been a freelancer but now that I am, I also need to do the administrative stuff to keep the business running. It's not what I love doing. What I love doing is building systems and troubleshooting. So when my administrative process for billing/invoicing became too painful as I gained more clients, I decided to "troubleshoot" it and enhance it.
I was already using Clockify (free) to track my time for different clients and projects. It works well for me. I was also already using self-hosted Dolibarr to invoice my clients on both sides of the Atlantic. It also works well for me. What was more annoying, however, was taking the export from Clockify, bringing it into a spreadsheet and then copying that for my Dolibarr-generated invoices.
I tried using coupler.io (free) to suck the data from Clockify into Google Sheets and then from there into Excel (which I prefer over Google Sheets). This was definitely better than a straight export from Clockify (client-by-client) that I would then copy into Excel and massage a bit - but relying on all the free versions of different services only got me so far. There were edge cases that meant more data massaging out the back end.
My target Nirvana
So what did I want to do anyway? I guess I wanted to be able to copy a table from a spreadsheet (that already had the right numbers and format in it for that month, for that client) and paste it into an invoice "note" in Dolibarr. I realized that I would need to do some kind of coding to use the Clockify api to get the data I wanted and then some kind of coding in Excel to format/massage that data.
I still have some fine-tuning to do with respect to formatting, etc. but achieving the "heavy lifting" was so satisfying at the end, (and fairly complex), that I thought I'd share my experience so that maybe, at least, one other person might have a model to work from that helps them fill in the conceptual gaps.
Which "glue" to use?
I love using glueware to create functioning systems/sub-systems that accomplish real work. It is often difficult to learn to use a new piece of glueware for the first time, but the results can be sooooo satisfying! Then the gates are open for subsequent use of the tool and the horizon of things that can be accomplished grows. Over the years, I've done this with TSO Clist, MVS Rexx, WAAPDSUT, SyncSORT, DOS Batch, VBScript, AutoIt, VBA, Bash scripts, PHP, etc.
I considered perhaps trying to go straight from Clockify to Dolibarr since they're both online products, but the layover in Excel-land, does offer other benefits. It also seemed a bit of a bridge too far to get things directly into Dolibarr. Maybe in the future.
I figured that it would be VBA since that is integrated into Excel and I've used VBA before - but mostly to create "applications" and rarely with Excel.
But as I searched it looked as if Power Query, which I had never used and had only really heard about vaguely before, was probably the way to go. There was nothing outlining exactly what I was trying to do but a fair amount of StackOverflow-kind-of-posts about Power Query access to Clockify via its api to pique my interest.
Little did I know how powerful Power Query was!
The Solution
Here is a step-by-step process to create a single sheet which corresponds to a Clockify workspace in an Excel 2019 workbook and to populate it with last month's data (if it is the 1st-15th of the month) or this month's to date data (if it is the 16th through the end of the month) rolled up to the task level (all the entries of a given task will be rolled up to one line item):
- Create a sheet in an Excel 2019 workbook. We'll name it Parameters.
- In Parameters, create a table that looks like this:

- Name cell A2 StartDate and cell B2 EndDate
- What you see in A2 and B2 are not static strings but the result of formulas in each cell. Depending on what day of the month it is today, these forumlae return the beginning and ending dates of last month or the beginning date of this month and today. These are the dates that will be passed to Clockify to indicate the date range for which we are requesting time-tracking data.
Populate StartDate with the following formula:
=IF(DAY(TODAY())<16,CONCAT(TEXT(EDATE(TODAY(),-1),"yyyy-mm"),"-01T00:00:00.000Z"),CONCAT(TEXT(DATE(YEAR(TODAY()),MONTH(TODAY()),1),"yyyy-mm-dd"),"T00:00:00.000Z"))
- Populate EndDate with the following formula:
=IF(DAY(TODAY())<16,CONCAT(TEXT(EOMONTH(TODAY(),-1),"yyyy-mm-dd"),"T23:59:59.999Z"),CONCAT(TEXT(EOMONTH(TODAY(),0),"yyyy-mm-dd"),"T23:59:59.999Z"))
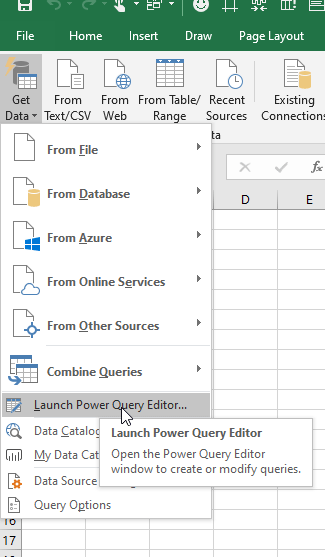
- From the Data tab in Excel, access the pull-down menu from the Get Data icon and Launch the Power Query Editor:
- Once you're in there, you'll first need to change some privacy settings or your queries will fail and be blocked by the Formula Firewall with text like "
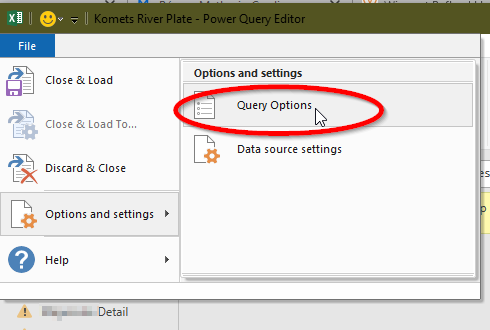
Formula.Firewall: Query 'Query1' (step 'Source') references other queries or steps, so it may not directly access a data source. Please rebuild this data combination" that will stop the processing of the query. So you have to go to File > Options and settings >Query Options (like this)
Then you need to pick General > Privacy and select "Always ignore Privacy Level settings" (like this)

and press OK. Now you should not have this problem.
- Create a new, blank query via the New Query > New Source > Other Sources > Blank Query selection in the Ribbon:
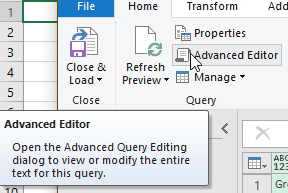
- Launch the Advanced Editor in Power Query - this is where you can add code to access the Clockify API.
- Remove the bit of text already in the Advanced editor and paste this. It's what I have in the Advanced Editor and you can use it by simply adding your Clockify API key and Clockify Workspace ID
let
  url="https://reports.api.clockify.me/v1/workspaces/YourWorkspaceIDGoesHere/reports/detailed/",
     content ="{
       ""dateRangeStart"": """ & #"MyStartDate" & """,
       ""dateRangeEnd"": """ & #"MyEndDate" & """,
       ""detailedFilter"": {
         ""page"": ""1"",
         ""pageSize"": ""200"",
         ""sortColumn"": ""DATE""
       },
       ""sortOrder"": ""ASCENDING"",
       ""exportType"": ""JSON"",
       ""rounding"": ""false"",
       ""amountShown"": ""EARNED"",
       ""billable"": ""true""
         }",
     Source = Json.Document(
                     Web.Contents(url,    [Headers=    [ #"X-Api-Key"="YourClockifyAPIKeyGoesHere"
                                                         ,ContentType="application/json"
                                                         ,#"Content-Type"="application/json"
                                                        ]
                                          ,Content=Text.ToBinary(content)
                                          ]
                                  )
                              ),
     timeentries = Source[timeentries],
     #"Converted to Table" = Table.FromList(timeentries, Splitter.SplitByNothing(), null, null, ExtraValues.Error),
     #"Expanded Column1" = Table.ExpandRecordColumn(#"Converted to Table", "Column1", {"description", "timeInterval", "amount", "rate", "projectName", "clientName"}, {"description", "timeInterval", "amount", "rate", "projectName", "clientName"}),
     #"Expanded timeInterval" = Table.ExpandRecordColumn(#"Expanded Column1", "timeInterval", {"duration"}, {"duration"}),
     #"Renamed Columns" = Table.RenameColumns(#"Expanded timeInterval",{{"duration", "Time (sec)"}}),
     #"Inserted Division" = Table.AddColumn(#"Renamed Columns", "Division", each [#"Time (sec)"] / 3600, type number),
     #"Inserted Rounding" = Table.AddColumn(#"Inserted Division", "Round", each Number.Round([Division], 2), type number),
     #"Renamed Columns1" = Table.RenameColumns(#"Inserted Rounding",{{"Round", "Hours (dec)"}}),
     #"Removed Columns" = Table.RemoveColumns(#"Renamed Columns1",{"Division"}),
     #"Inserted Division1" = Table.AddColumn(#"Removed Columns", "Division", each [rate] / 100, type number),
     #"Renamed Columns2" = Table.RenameColumns(#"Inserted Division1",{{"Division", "Rate"}}),
     #"Inserted Multiplication" = Table.AddColumn(#"Renamed Columns2", "Multiplication", each [Rate] * [#"Hours (dec)"], type number),
     #"Renamed Columns3" = Table.RenameColumns(#"Inserted Multiplication",{{"Multiplication", "Amount"}}),
     #"Removed Columns1" = Table.RemoveColumns(#"Renamed Columns3",{"Time (sec)", "amount", "rate"}),
     #"Renamed Columns4" = Table.RenameColumns(#"Removed Columns1",{{"clientName", "Client"}, {"projectName", "Project"}, {"description", "Task"}}),
     #"Reordered Columns" = Table.ReorderColumns(#"Renamed Columns4",{"Client", "Project", "Task", "Hours (dec)", "Rate", "Amount"}),
     #"Grouped Rows" = Table.Group(#"Reordered Columns", {"Client", "Project", "Task"}, {{"Hours (dec)", each List.Sum([#"Hours (dec)"]), type number}, {"Amount", each List.Sum([Amount]), type number}}),
     #"Sorted Rows" = Table.Sort(#"Grouped Rows",{{"Client", Order.Ascending}, {"Project", Order.Ascending}, {"Task", Order.Ascending}}),
     #"Changed Type" = Table.TransformColumnTypes(#"Sorted Rows",{{"Amount", Currency.Type}})
 in
     #"Changed Type"
So, in this code, you'll need to furnish the following two identifiers:
- YourWorkspaceIDGoesHere - This is found embedded in the URL of your Clockify session. So, for example, you signin to Clockify and go to the Setting screen for a given workspace. Your URL looks something like this: https://clockify.me/workspaces/*******************/settings#settings. This part: ******************* is your Workspace ID. Copy it from the URL and replace the text YourWorkspaceIDGoesHere in the code.
- YourClockifyAPIKeyGoesHere - This is found in your Clockify user profile that you can get to by hovering over your picture in the upper right hand of the screen, clicking on Profile and then scrolling down to the API section near the bottom:
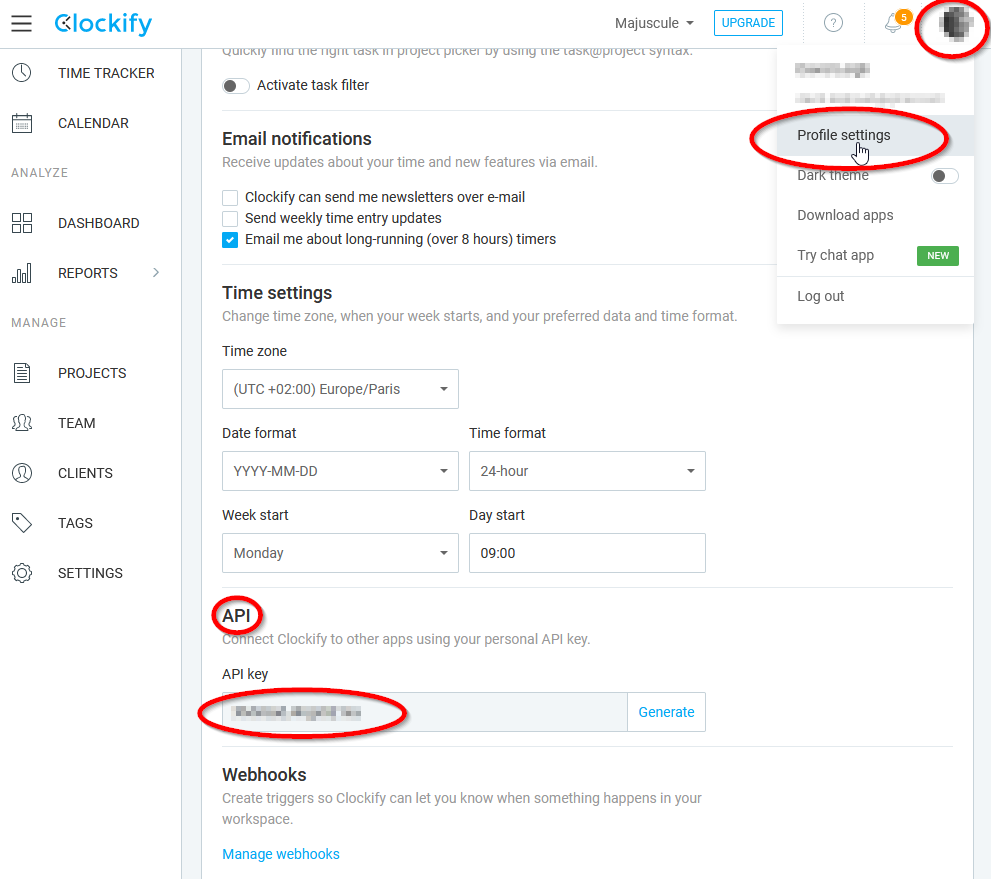
Copy this text and replace the text YourClockifyAPIKeyGoesHere in the code.
- When you've modified your code, click on Done and you should see Power Query processing to grab your Clockify data and process it. Hopefully you'll have the results you want/need.
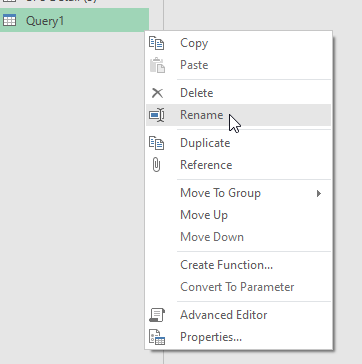
You can modify the massaging of the data to do all sorts of things that suit your situation. In the Query Settings in the right-hand pane of Power Query, you'll see all the steps of the query broken down. You can remove them one-by-one from the bottom up to see what the results are and to apply what you want/need. - I would suggest that you rename your query to match that of your Workspace name to avoid confusion:
- When you have what you want/need from your query, you can put it in your Excel sheet. So with that query selected in Power Query, click on the Close and Load button to load that query into your Excel sheet:
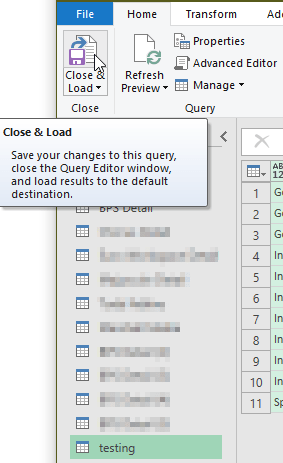
You should then see it in your Excel sheet (it may take a bit of time to actually load):

- This should load into a new worksheet (it does for me). Just for convention's sake, I'd rename this worksheet to match the Clockify workspace name.
Once you have this working correctly, you can duplicate existing queries in Power Query, making it fairly easy to add new Clockify Workspaces to this process. Hopefully this has been helpful for you.


0 Comments